This article contains affiliate links. PoodleGuru may earn a small commission if you purchase through our links, at no extra cost to you.
Poodle Nail Dremel vs Clipper: 8 Expert Safety Tips
The quiet hum of a nail grinder or the quick snip of a clipper can both keep your poodle comfortable. This poodle nail dremel vs clipper guide explains which tool is safer for dark nails, which is calmer for nervous dogs, and how to trim without rushing the quick.

Poodle Nail Dremel vs Clipper: Quick Answer
For most poodle owners, a pet nail dremel or grinder gives more control and a smoother finish, especially on dark nails where the quick is hard to see. Clippers are faster and completely silent, but they require precise judgment and can leave sharp edges if not followed with filing. If your poodle tolerates the sound and vibration after gradual training, a dremel is usually the better long-term tool. If your dog panics at buzzing sounds, a high-quality scissor-style clipper with tiny cuts is still a safe and practical option.
In This Guide
- Quick Facts: Dremel vs Clipper at a Glance
- Why Poodle Nails Need Special Attention
- How Nail Clippers Work on Poodle Nails
- How a Nail Dremel Works on Poodle Nails
- Poodle Nail Dremel vs Clipper Comparison Table
- The PoodleGuru Quiet Dremel Introduction Method
- Common Mistakes With Both Tools
- Which Tool Fits Your Poodle’s Personality?
- Cost and Long-Term Value
- How to Dremel Poodle Nails Step-by-Step
- Frequently Asked Questions
Quick Facts: Dremel vs Clipper at a Glance
Nail Clippers
Speed: One squeeze, one nail — very fast.
Noise: Completely silent.
Finish: Often leaves a sharper edge that may need filing.
Risk: Higher chance of cutting too close on dark nails.
Best for: Dogs calm with paw handling and owners confident with tiny cuts.
Nail Dremel
Speed: Slower, gradual nail removal.
Noise: Low hum or vibration that can worry sensitive dogs.
Finish: Smooth and rounded.
Risk: Friction heat if held too long in one spot.
Best for: Dark nails, scratch prevention, and owners who can train patiently.
Key Difference
Clippers cut. Dremels grind. That difference changes the sound, sensation, finish, and safety margin. Neither tool is perfect for every poodle, but one will usually match your dog’s temperament better.
Why Poodle Nails Need Special Attention
Poodles often have hard, fast-growing nails that curve downward as they lengthen. Many poodles, especially darker-colored dogs, have black or dark brown nails where the quick — the sensitive blood vessel and nerve area inside — is not visible from the outside. That makes nail care feel intimidating for new owners.
Overgrown nails can change how a dog places weight on the paw, create pressure through the toes, catch on fabric, scratch people during play, and make grooming more stressful. Regular nail maintenance is a basic part of keeping dogs comfortable and mobile, and the ASPCA includes nail trimming as part of routine dog grooming.
Because poodles are commonly professionally groomed every 4–6 weeks, nail care often happens during those appointments. Still, many poodles need light between-groom touch-ups, especially active dogs with nails that click on hard floors before the next full groom.
How Nail Clippers Work on Poodle Nails
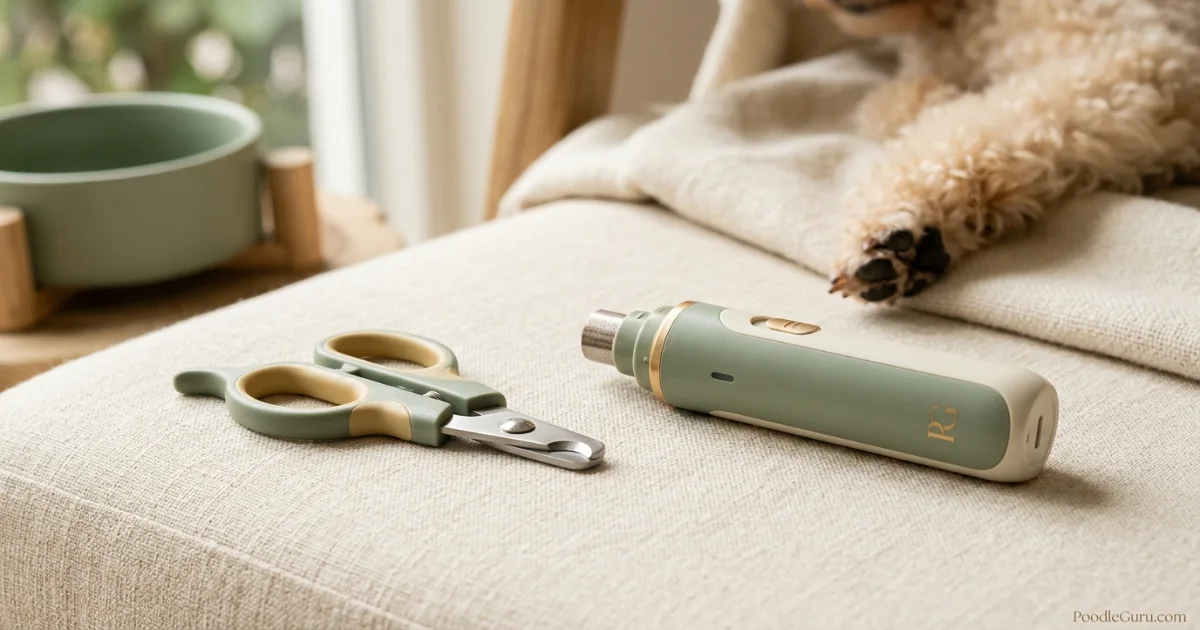
A nail clipper — scissor-style, plier-style, or guillotine-style — cuts through the nail in a single motion. The pressure is sudden, and the nail’s cross-section is exposed immediately. On pale nails, the quick may be visible as a pink area. On dark nails, you have to trim carefully from the tip and watch the cut surface.
Clippers have one major advantage: silence. There is no motor sound, no vibration, and no charging. For a poodle that dislikes buzzing noises, that can be a big relief. The trade-off is precision. If your poodle pulls the paw away or you remove too much nail at once, you can cut into the quick, causing pain and bleeding. Even a correct cut can leave a rough or sharp edge, so many owners keep a nail file or grinder nearby for finishing.
How a Nail Dremel Works on Poodle Nails
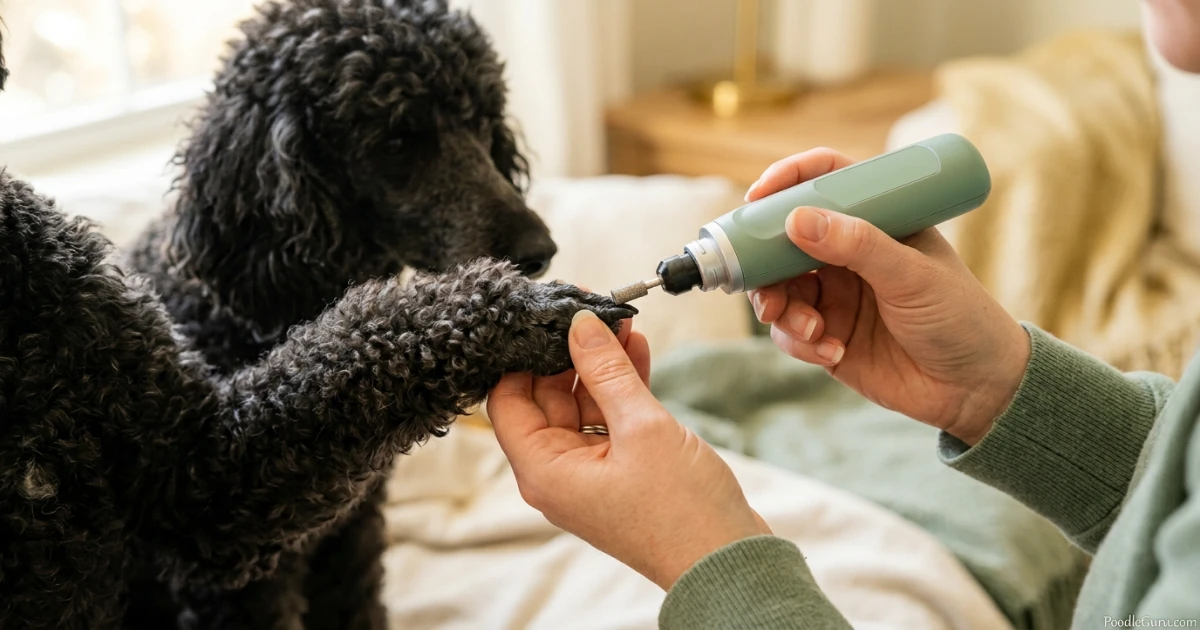
A nail dremel — more accurately, a pet nail grinder or rotary nail file — uses a sanding drum to remove nail layers gradually. For poodle owners, that gradual control is the main benefit. You can shorten the nail slowly, check the surface often, and stop before getting too close to the quick.
The result is usually a smooth, rounded nail that is less likely to scratch skin, snag fabric, or feel sharp after trimming. Many pet-specific grinders are cordless, rechargeable, and designed to run at lower, gentler speeds than hardware rotary tools.
The challenge is sound and vibration. Some poodles accept a grinder quickly; others need several days or weeks of positive conditioning. Heat is another concern. Holding the sanding drum on one spot for too long can warm the nail and cause discomfort, so short touches and frequent pauses matter.
Poodle Nail Dremel vs Clipper Comparison Table
| Attribute | Nail Clipper | Nail Dremel / Grinder |
|---|---|---|
| How it works | Cuts through the nail in one motion | Grinds the nail down in thin layers |
| Noise level | Silent | Low to moderate hum; may scare noise-sensitive dogs |
| Finish | Fast cut but may leave sharp edges | Smooth, rounded finish |
| Quicking risk on dark nails | Higher if too much is cut at once | Lower for careful users because removal is gradual |
| Speed per nail | 1–2 seconds | 5–15 seconds depending on nail length |
| Heat generation | None | Possible friction heat; requires short contact |
| Learning curve | Simple tool, but quick judgment is important | Moderate tool handling, easier gradual control |
| Typical cost (2026) | $10–$30 | $30–$80 for many pet-specific models |
| Best for | Calm dogs, light nails, quick silent trims | Dark-nailed poodles, smoother finish, scratch prevention |
The PoodleGuru Quiet Dremel Introduction Method
Rushing the introduction is the biggest reason poodles reject a grinder. Use this 5-step method before expecting your dog to accept a full nail session.
Sound Only, No Touch
Turn the grinder on across the room while your poodle eats a high-value treat. Keep sessions short and calm. The goal is simple: the sound predicts something good.
Sound Near the Body, No Nail Contact
Move the running tool closer over several sessions without touching the paw. Reward calm behavior. Do not chase the paw with the tool.
Touch the Tool Off to One Nail
With the grinder turned off, gently rest the sanding drum near one nail for a second or two. Reward immediately. This teaches your poodle that the tool touching the paw is not a threat.
One Second of Grinding, Then Reward
Turn the grinder on, touch one nail for just one second, remove it, and reward. Do only one or two nails at first if your poodle is unsure.
Gradually Build Duration
Over the next week, build to short 2–3 second touches, rotating between nails. Always stop before your dog becomes stressed. Calm progress is more valuable than finishing every nail in one sitting.
Common Mistakes With Both Tools
Clipper Mistake: Taking Too Much at Once
Trying to shorten a long nail in one big cut increases quicking risk. Fix: remove tiny slices from the tip only, especially on dark nails.
Dremel Mistake: Staying in One Spot
Holding the sanding drum still for too long can create heat. Fix: use short touches, keep the tool moving, and pause often.
Training Mistake: Skipping Paw Handling
Nail tools are much easier when your poodle is comfortable with paw touch. Fix: practice gentle paw holds daily and reward before adding any tool.
When to Call a Professional Groomer or Vet
If your poodle consistently panics, growls, snaps, or has extremely overgrown nails, stop and get help. A professional groomer or veterinary technician can demonstrate safe handling. For painful, infected, broken, or severely overgrown nails, contact your veterinarian before attempting home trimming.
Which Tool Fits Your Poodle’s Personality?
No comparison chart replaces your knowledge of your own dog. A confident, food-motivated poodle may learn to accept a grinder within a week. A poodle with a history of grooming stress may do better with silent clippers and very tiny cuts. If your poodle has black nails, the grinder’s gradual removal is a real safety advantage. If your poodle startles at every buzzing sound, clippers may keep everyone calmer.
Many experienced poodle owners keep both tools. They may clip only the sharp tip when they are short on time and use the grinder for smoothing. Others use a grinder for routine maintenance and clippers only for a broken or sharply pointed nail. The best answer is the tool your dog can tolerate consistently.
Cost and Long-Term Value (2026)
Dog nail clippers usually cost between $10 and $30 for a well-made scissor-style or plier-style model. A pet-specific cordless grinder commonly costs $30 to $80, with replacement sanding bands available in inexpensive multi-packs. Over a poodle’s lifetime, either tool is a small expense compared with full grooming appointments.
The real value question is not only price. It is whether the tool helps you maintain nails regularly without fear. A $60 grinder is worth it if it lets you do calm weekly touch-ups. A $15 clipper is equally valid if your poodle accepts silent snips and you are confident taking tiny cuts.
Owner Insight: The Hybrid Method Works Well
Many owners use clippers to remove only a tiny sharp tip, then use a grinder to round the edges. This combines speed with a smooth finish and can be easier than relying on one tool for every situation.

How to Dremel Poodle Nails Step-by-Step
Once your poodle is comfortable with the tool, use this careful routine for a safe and efficient session.
Gather Supplies
Use a fully charged pet nail grinder, a fine-grit sanding band, styptic powder, good lighting, a non-slip surface, and high-value treats.
Position Your Poodle Comfortably
Have your poodle stand or lie on a stable, non-slip surface. Hold the paw gently but firmly, and avoid squeezing the toe joints.
Identify the Safe Zone
On light nails, look for the pink quick. On dark nails, work only on the very tip and shorten gradually. Never chase perfection in one session.
Grind in Short, Moving Touches
Use low or medium speed. Touch the sanding drum to the nail tip for 1–3 seconds, lift, and pause. Keep the drum moving rather than pressing in one place.
Check the Nail Face Often
Look at the cut surface frequently. If you see a darker center forming or your dog reacts, stop that nail and move to another or end the session.
Smooth and Reward
Lightly round any rough edge, then reward generously. Ending calmly matters more than finishing all nails at once.
Frequently Asked Questions
Is a nail dremel safer than a clipper for poodles?
For many dark-nailed poodles, a dremel is safer because it removes nail gradually instead of cutting a chunk at once. Clippers can also be safe, but they require tiny cuts and careful judgment.
Will the dremel noise scare my poodle?
It can. Some poodles dislike the hum and vibration at first. Use gradual desensitization with treats before attempting a full session. If your dog remains highly stressed, choose clippers or ask a groomer for help.
Can I use a regular hardware Dremel on my poodle’s nails?
A hardware rotary tool can be too powerful or too hot for beginner pet use. A pet-specific nail grinder is usually easier to control because it is designed for lower-speed grooming work.
How often should I trim my poodle’s nails?
Every 2–4 weeks is common, but some poodles need lighter weekly touch-ups. If you hear nails clicking on hard floors, they are likely getting too long.
My poodle has white nails. Do I still need a dremel?
Not necessarily. White nails make the quick easier to see, so careful clipping can work very well. A dremel is still useful if you want a smoother rounded finish.
What grit sanding band should I use on a poodle’s nails?
A fine or medium-fine pet grooming band is best for most home owners. Very coarse bands remove nail faster but can create heat and roughness if used carelessly.
Can I quick my poodle with a dremel?
Yes. A grinder can still reach the quick if you go too far. The advantage is that removal is gradual, so careful users usually have more warning before getting too close.
Do professional groomers use dremels or clippers on poodles?
Many use both. Clippers are useful for quick shortening, while grinders are useful for smoothing and rounding. The choice depends on the dog’s behavior, nail color, and the groomer’s technique.
Key Takeaways: Poodle Nail Dremel vs Clipper
Your tool choice should be about your poodle’s comfort and your confidence — not about which one looks better in a video.
- A nail dremel or grinder removes nail gradually and usually gives a smoother, rounder finish.
- Nail clippers are silent, fast, and affordable but require careful tiny cuts to avoid the quick.
- For dark poodle nails, the grinder is often easier to control because you shorten slowly.
- For noise-sensitive poodles, clippers may be calmer than a buzzing grinder.
- Use short grinder touches to prevent heat and keep every session calm.
- Many owners get the best results by keeping both tools and using them for different situations.
Build a calmer poodle grooming routine
Start with paw handling, choose the tool your poodle can tolerate, and keep every session short. For a complete routine, continue with the full grooming and paw-care guides below.